
CDL Frame Inspection Guide: Rails, Crossmembers and Mounting Hardware
The frame carries the cab, powertrain, suspension and coupling loads while keeping every system aligned. A crack, loose crossmember or moving mount can affect far more than one component, which makes the frame a structural checkpoint—not background metal.
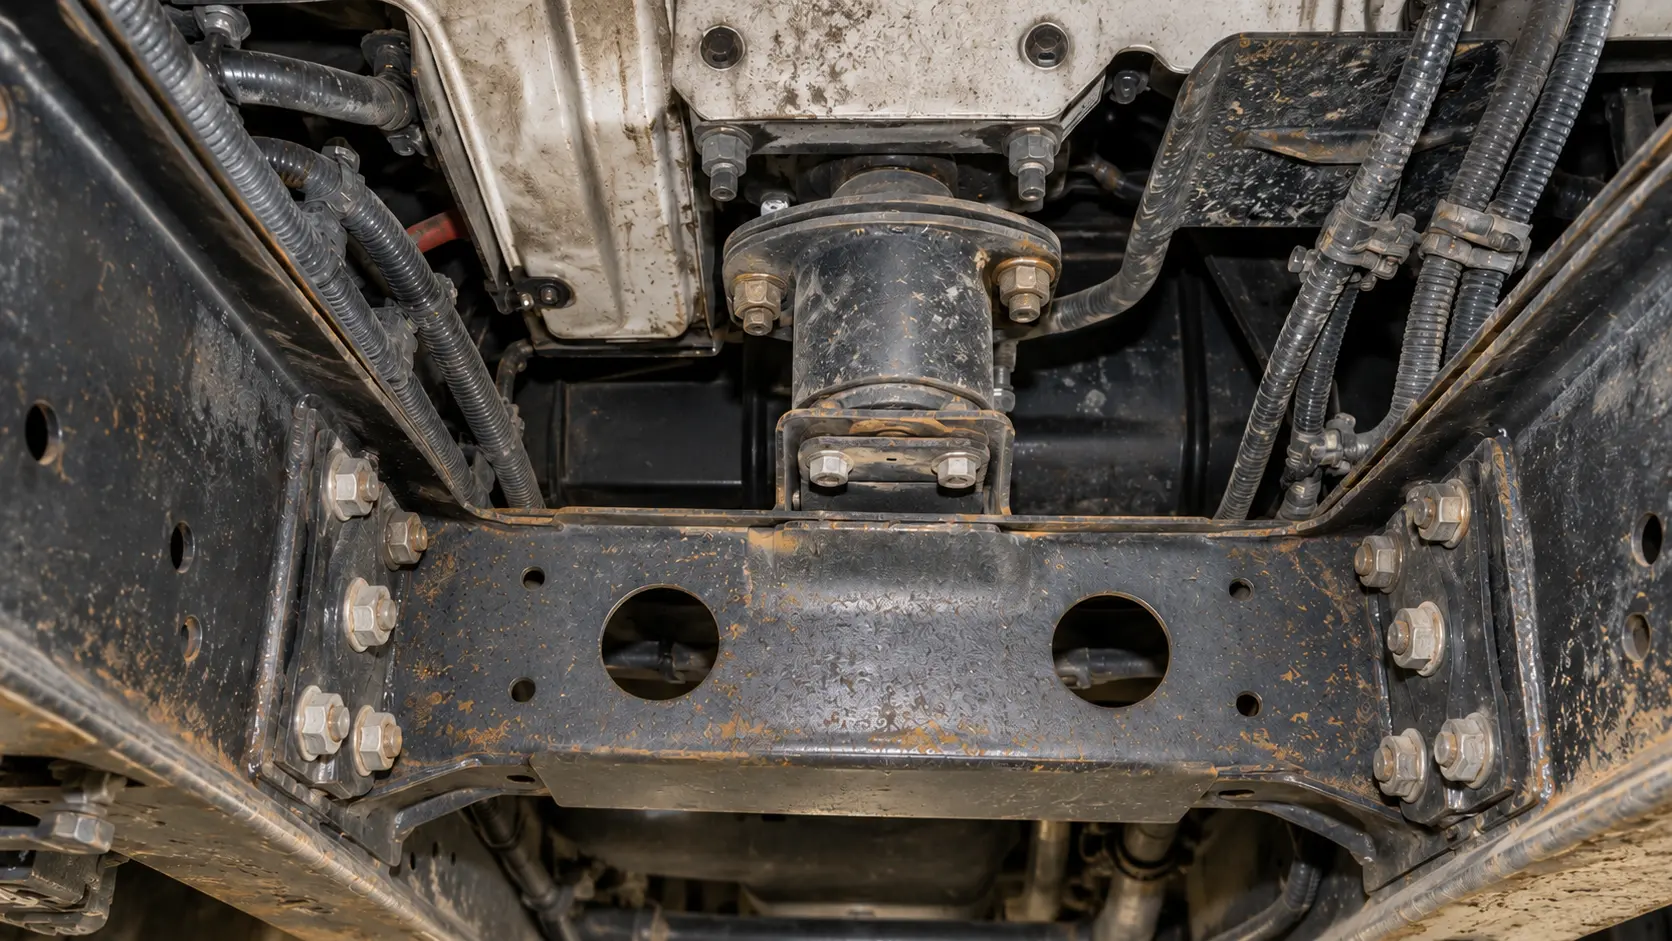
A useful frame inspection combines a repeatable visual route with careful language. Drivers should recognize an observable defect and place it accurately; structural diagnosis, torque checks and repairs belong to qualified maintenance personnel using the vehicle manufacturer’s information.
49 CFR 393.201 says a commercial motor vehicle frame or chassis may not be cracked, loose, sagging or broken. It also addresses cab and body attachment, rail-flange alterations, welding and drilled holes. The federal minimum periodic-inspection standards reject cracked, broken, loose or sagging frame members and loose or missing fasteners that attach safety-related components.
Know the structure you are viewing
| Area | What it does | Visible warning clues |
|---|---|---|
| Frame rail web | Forms the vertical portion of each main rail. | Cracks, bends, buckling, impact damage, heavy section loss or fresh movement marks. |
| Top and bottom flanges | Provide much of the rail’s resistance to bending. | Bends, cuts, notches, unauthorized holes, cracking or distortion. |
| Crossmembers | Hold the rails in position and support mounted systems. | Cracks, broken brackets, distortion, loose joints or contact with nearby components. |
| Fasteners and brackets | Secure crossmembers, mounts and functional components. | Missing or backed-out hardware, shifted paint, rust trails, polished metal or wallowed holes. |
| Cab and body mounts | Attach the cab or body while controlling movement and vibration. | Loose or missing hardware, broken bracket, displaced bushing or unusual cab-to-frame gap. |
| Component mounts | Support steering, suspension, engine, transmission and coupling equipment. | Cracked parent metal, loose mount, broken weld, shifted component or interference. |
A tractor, straight truck and bus do not present the same frame layout. Follow the actual rails from front to rear, identify the crossmembers and mounts installed on that vehicle, and never assume that an empty hole or visible weld is automatically a defect without checking the design and manufacturer information.
Set up a safe inspection
Park on firm, level ground when available, apply the parking brakes, place the transmission in the prescribed secure position and follow the carrier’s chocking or lockout procedure. Control the key so another person cannot start or move the vehicle. Use a flashlight and safely visible angles from outside the vehicle.
Do not crawl beneath a truck at the roadside or rely on air suspension, a jack or a parking brake as the only protection. Inspection pits and lifts belong to trained personnel following the facility’s support and energy-control procedures. If a location cannot be viewed safely, report the limitation and request a qualified shop inspection.
A practical frame inspection sequence
- Start at the front rail area. Look behind the bumper and around visible steering, engine and cab-mount brackets for cracks, distortion and secure hardware.
- Trace each rail. Follow the web and visible flange edges. Look for an abrupt bend, buckle, notch, split, fresh scrape or line that continues from a hole or bracket corner.
- Inspect every visible crossmember connection. Check both ends for broken metal, shifted brackets, missing fasteners and shiny movement marks.
- Check cab and body attachment. Confirm that visible bolts, brackets and bushings appear present, aligned and secure. Compare both sides when the design is symmetrical.
- Check functional-component mounts. Pay attention where the steering gear, suspension, powertrain and fifth-wheel structure attach to the frame.
- Look for clearance problems. Verify that the frame and body are not contacting a tire or wheel assembly and that hoses, wiring, tanks and rotating parts are not rubbing a rail or crossmember.
- Finish with the rear structure. Inspect the visible frame ends, rear crossmember, tow equipment or body attachment installed on the vehicle.
The Class A ELDT curriculum requires instruction and demonstrated proficiency in pre-trip, enroute and post-trip inspection. That federal curriculum does not replace the current State skills-test checklist, carrier procedure or manufacturer’s inspection and repair instructions for the particular truck.
Read cracks, rust and movement clues carefully
A structural crack often begins at a stress concentration such as a fastener hole, bracket corner, weld edge or abrupt change in section. Use changing light angles to look for a defined line, separated paint, fresh rust emerging from a line or metal that no longer sits flush. Do not strike, scrape or pry a frame member to “prove” a suspected crack.
Light surface rust is different from deep scaling or section loss. Report heavy flaking, swelling between joined parts, perforation or any condition that hides the metal well enough that the structure cannot be evaluated. A driver’s report should describe the evidence—“heavy layered scale at left rear crossmember bracket”—rather than declare how much strength remains.
Understand the special rules for flanges, holes and welds
The top and bottom flanges are critical parts of a C-channel rail. Section 393.201 prohibits bent, cut or notched flanges between the axles except as the manufacturer specifies. It also prohibits holes drilled in the top or bottom flanges except as specified by the manufacturer.
A weld is not automatically proof of an illegal repair, but it is not something to approve by appearance alone. Accessories welded to the frame and welded frame repairs must follow the vehicle manufacturer’s recommendations. Record the exact location, photograph it under carrier policy if permitted, and let qualified maintenance verify the procedure and documentation.
Inspect again after an impact or unusual event
A curb strike, high-center event, dropped trailer, collision, severe pothole or shifted load can introduce damage that was not present at departure. After stopping safely, look for a new cab-to-body gap, shifted fifth wheel, cracked crossmember, bent bracket, fresh scrape, displaced hose or wiring route, and any tire-to-frame contact.
Changes during operation also matter. A new pull, steering-wheel offset, cab movement, clunk, dog-tracking appearance or tire rub can point to frame, mount, suspension or alignment problems. Do not diagnose the cause from the driver’s seat; secure the vehicle and request a qualified inspection.
How to describe the frame during a CDL inspection
Name the structure, visible condition and safety purpose. A clear explanation could be:
“The visible frame rails and crossmembers are not cracked, broken, loose or sagging. Mounting brackets and fasteners appear present and secure, and I see no unauthorized-looking flange damage or contact with a tire, hose, wire or moving component.”
Do not claim to have inspected a hidden surface. Testing terminology varies by jurisdiction, so follow the examiner’s instructions and the official manual for your State.
What requires a stop-and-report decision?
Hold the vehicle for qualified evaluation when you find a suspected frame or crossmember crack, broken or sagging member, loose structural connection, missing component-mount fastener, displaced cab or body mount, tire contact, or fresh deformation after an impact. The same applies when a mounted steering, suspension, powertrain or coupling component has shifted against the frame.
The carrier’s systematic maintenance duty appears in 49 CFR 396.3. When a DVIR is required, the ProntoCDL post-trip and DVIR guide explains how to record a defect that could affect safe operation or cause mechanical breakdown. Use a location such as “right rail, forward crossmember, lower bracket” instead of writing only “frame bad.”
Common frame-inspection mistakes
- Looking only at the center of the rail. Cracks and movement clues often begin at holes, brackets, weld edges and crossmember connections.
- Calling every hole or weld illegal. Some are part of the approved design. Flag uncertainty for manufacturer-based review.
- Ignoring attached systems. A sound-looking rail can still have a loose steering, suspension, cab, powertrain or coupling mount.
- Using rust color as a diagnosis. Describe scaling, flaking, perforation, movement trails and obscured metal rather than judging by color alone.
- Entering an unsafe space for a better view. Inspection access never overrides secure-support and energy-control requirements.
Connect the frame check to the full walkaround
Continue from the rails into the driveshaft inspection, steering and suspension check, fifth-wheel inspection and engine-compartment inspection. If a defect leads to an enforcement inspection, review the roadside-inspection guide.
Practical takeaways
- Secure the truck and inspect only from safe, approved viewing positions.
- Trace both rails, every visible crossmember and the brackets at each connection.
- Look for cracks, breaks, sagging, distortion, missing hardware and fresh movement marks.
- Include cab, body, steering, suspension, powertrain and coupling mounts in the frame check.
- Treat flange cuts, notches, drilled holes and welds as manufacturer-information questions—not roadside guesses.
- Check for tire, wheel, hose, wire and rotating-component contact.
- Report the exact location and observable condition so maintenance can act.
CDL frame inspection FAQ
What should a CDL driver check on the truck frame?
From safe viewing positions, check the frame rails and crossmembers for cracks, breaks, sagging, distortion and fresh contact marks. Confirm that visible brackets and fasteners securing the cab, body, steering, suspension, powertrain and coupling components appear present and secure.
Does surface rust mean a truck frame has failed?
Light surface oxidation is not automatically the same as a crack, break or loss of section. Heavy scaling, flaking, swelling around fasteners, perforation or a line that may be a crack requires qualified inspection. Describe what you see rather than guessing at structural strength.
Can a truck frame be welded or drilled anywhere?
No. Federal rules say accessories and frame repairs must be welded in accordance with the vehicle manufacturer’s recommendations, and holes may not be drilled in the top or bottom rail flanges except as the manufacturer specifies.
What do shiny marks around a frame fastener mean?
Fresh polished metal, shifted paint, rust trails or fretting residue can indicate movement between parts. These are inspection clues, not a torque measurement. Report the exact location and have qualified maintenance evaluate the joint.
Should a driver crawl under a truck to inspect the frame?
A routine walkaround should use safely visible inspection points. Do not enter beneath a vehicle unless it is secured under an approved shop procedure with appropriate supports and energy controls. Ask qualified maintenance personnel to inspect areas that cannot be viewed safely.
Should a frame defect be reported on a DVIR?
A discovered defect that could affect safe operation or cause mechanical breakdown should be reported through the carrier process. When a federal DVIR is required, identify the vehicle, exact location and observable condition so maintenance can act.
Build a complete inspection route.
Learn the structure, name the evidence and report uncertainty before it becomes a roadside failure.
Start free CDL practice