
CDL Engine Compartment Inspection: Fluids, Belts and Leaks
An engine-compartment check is not a hunt for memorized phrases. It is a controlled scan for evidence: the correct fluid level, a dry and secure connection, an intact belt or hose, protected wiring and a component that is still mounted where it belongs. Build the same visual route every time, then stop and report anything you cannot verify safely.
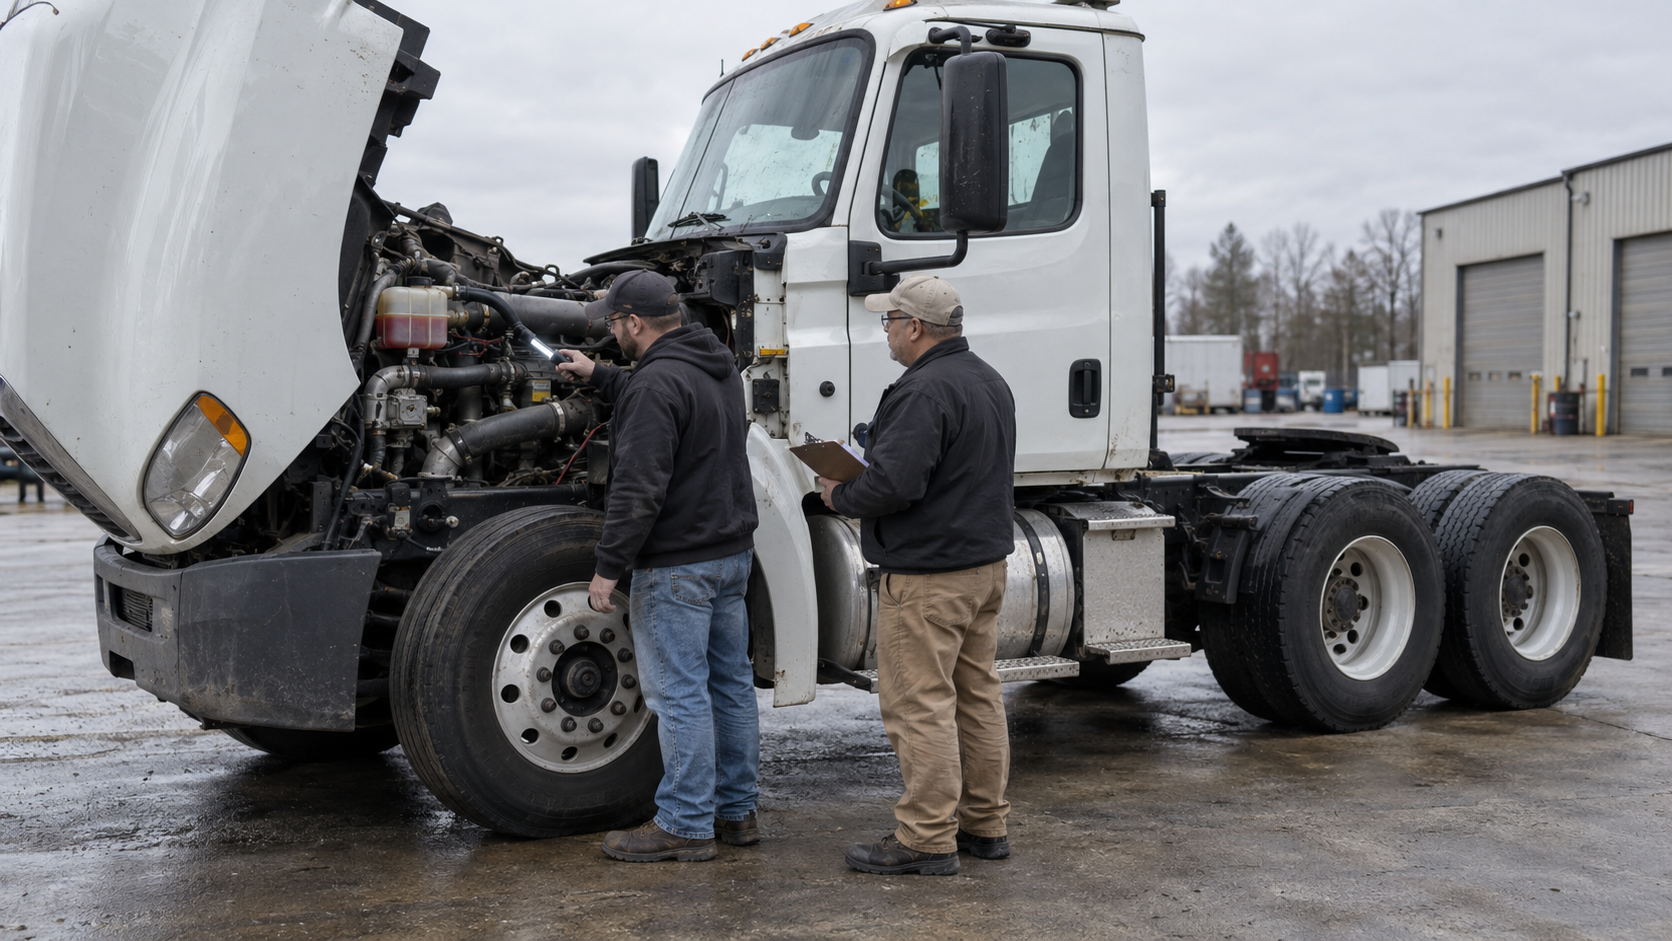
The open hood exposes heat, stored pressure, electrical energy and parts that can move without warning. A professional inspection begins by controlling those hazards. The goal is to recognize a condition that needs attention—not to improvise a repair or reach into a running engine.
What the federal standard actually requires
49 CFR 383.113 requires a CDL applicant to identify safety-related parts and explain what must be inspected for safe operation. “Engine compartment” is one of the areas named for every test vehicle. The rule establishes the skill; the State testing procedure determines how the applicant demonstrates it.
The federal Class A ELDT curriculum also requires instruction in pre-trip, post-trip and enroute inspections. Its vehicle-systems section specifically covers the engine, exhaust auxiliary systems and the identification and diagnosis of malfunctions. A useful routine therefore connects test language to real defect recognition.
Federal 49 CFR 392.7 says a commercial vehicle may not be driven until the driver is satisfied that specified safety parts and accessories are in good working order. That list is not an engine-bay script; use it alongside the vehicle manual, employer procedure and applicable State test guide.
Secure the truck before opening the hood
- Use a safe location. Park on firm, level ground away from moving traffic, apply the parking brake and follow the training provider or carrier’s wheel-securement procedure.
- Control the key and start procedure. Unless an authorized step requires the engine to run, shut it off and keep anyone from starting it while hands or tools are near the engine.
- Let hot systems settle. Never open a hot coolant cap. Avoid hot exhaust parts, turbocharger surfaces and recently pressurized hoses.
- Open the hood correctly. Release both latches, use the designed handholds and confirm the hood is fully supported. Do not stand in the hood’s travel path.
- Keep a clean working boundary. Secure loose clothing, hair, jewelry, flashlights and papers. Stand on the ground; do not climb on a tire, step, fuel tank or frame component to gain reach.
Start with one full-compartment scan
Before focusing on individual parts, look across the entire compartment. A wide scan can reveal a new spray pattern, a shiny wet area, a loose wire loom, a hose resting against a pulley, leaves near a hot surface or a component sitting at an unusual angle. Then look beneath the truck. A puddle’s location is a clue, but airflow and gravity can carry fluid away from its source.
Use a flashlight and your eyes before using a hand. Do not taste, smell closely or wipe an unknown substance with bare skin. Note its color, apparent source and whether it is a stain, seep, drip or active spray, then report what you actually observed.
A repeatable engine-compartment route
| Checkpoint | What to inspect | Stop-and-report clues |
|---|---|---|
| Engine oil | Level by the approved dipstick or electronic method; cap secure; surrounding area dry | Level outside the specified range, missing cap, fresh leak or spray pattern |
| Coolant | Cold level visible within reservoir markings; tank, cap area and hoses secure | Low level, cracked or stained reservoir, bulging hose, wet connection or overheating evidence |
| Power steering | Reservoir level and cap where equipped; pump, lines and fittings secure and dry | Low level, foaming, active seep, rubbed hose or loose pump mounting |
| Washer fluid | Usable level, cap present and reservoir and line intact | Empty or cracked reservoir, disconnected line or fluid leaking onto wiring |
| Belts and pulleys | Belt seated correctly with no cracks, fraying, glazing, contamination or missing ribs; pulleys aligned | Belt nearly failed, off track or visibly loose; damaged pulley or tensioner |
| Hoses and clamps | No cuts, swelling, abrasion, collapse, hard bends or contact with hot or moving parts; clamps secure | Bulge, exposed reinforcement, fresh leak, loose connection or unsafe routing |
| Wiring and batteries | Looms supported; insulation intact; terminals and covers secure where visible | Exposed conductor, scorch mark, loose cable, damaged cover or wiring against heat or motion |
| Driven accessories | Alternator, air compressor and steering pump securely mounted with visible fasteners present | Broken bracket, loose or missing fastener, misalignment or fresh metal contact |
| Fuel and exhaust | Visible lines, filters, connections and exhaust parts secure, dry and clear of combustible material | Any visible fuel leak, exhaust leak evidence, damaged line or heat threatening wiring or hose |
| Engine and frame mounts | Mounting points and nearby frame areas secure with no obvious cracks or displacement | Loose or missing fastener, broken mount, cracked member or abnormal engine position |
Component location and the correct level-check method vary by truck. On some vehicles the dipstick is reachable only from one side; others use electronic level reporting. Learn the actual truck rather than inventing a universal sequence.
Read fluid clues without guessing
A dark amber or black trace may suggest engine oil; a thin colored residue near a reservoir may suggest coolant; a diesel odor near a wet fitting may suggest fuel. Those are clues, not a diagnosis. Road grime, rainwater and old service residue can imitate a leak.
- Trace upward only from a safe distance; fluid usually travels down and rearward.
- Look for the highest fresh wet point, clean streaks through dust and repeated droplets.
- Describe the exact location and activity instead of naming a failed part you cannot verify.
- Treat fuel on any line, fitting or surface as a serious fire and environmental hazard.
The federal minimum periodic inspection standards reject a visible fuel-system leak and address damaged exhaust routing, loose air-compressor mounts and loose fasteners attaching the engine and other functional components. Those standards are not permission for a driver to make a roadside repair; they show why apparently small visual clues deserve prompt reporting.
Inspect belts without the universal-deflection myth
Many study scripts repeat one belt-deflection number as if it fits every engine. It does not. Belt length, load, tensioner design and manufacturer specifications differ. With the engine off and protected from starting, inspect the full visible belt surface for transverse cracks, missing rib material, frayed edges, oil or coolant contamination and a belt that is walking off a pulley.
Do not reach past a fan shroud or rotate the engine by hand. If the entire belt cannot be seen safely, report the limitation and use the authorized inspection method. A belt driving the alternator, water pump, air compressor or steering pump can turn a small defect into several system failures.
Follow every hose from support to connection
A hose can look sound in the middle and fail at a clamp, bend or rub point. Follow each visible section to its connection. Check for a shiny abrasion spot, exposed reinforcement, swelling near the end, a soft-looking bulge, a hard kink or contact with a hot exhaust surface. Verify that supports keep the hose away from pulleys and fan blades.
Do not squeeze a hot or pressurized hose. Do not tighten a clamp simply because residue is present; the hose, fitting or component could be cracked. Mark the location mentally or with an approved tag and give maintenance an accurate report.
Use extra control for any running check
An instructor, examiner or manufacturer procedure may require observation with the engine running. Before the start, account for every person and tool, close or secure anything that could be drawn into the engine and establish where the observer will stand. Keep hands, clothing and the flashlight outside the path of the fan, belts and pulleys. Remember that some cooling fans can engage automatically.
Listen from a safe position for an unusual squeal, knock, hiss or exhaust pulse and watch for movement, spray or smoke. Shut the engine down before moving closer. The engine must never be running merely to make the inspection sound more realistic.
Turn observations into CDL test language
Use one compact pattern: name it, condition it, explain it.
- Name: “This is the coolant reservoir.”
- Condition: “It is secure, the cold level is within the marked range, and I see no cracks or leaks.”
- Purpose: “That lets the cooling system maintain the engine’s proper operating temperature.”
Point only when it is safe. Avoid empty phrases such as “not bent, broken or cracked” for a fluid level or “properly mounted” for a flexible belt. Match the words to the component’s real failure modes.
Know the defects that end the inspection
Do not start or move the truck when the inspection reveals a condition that could cause immediate failure, fire, loss of steering assistance, loss of air supply or overheating. Examples include a visible fuel leak, an active fluid spray, a nearly failed belt, a badly swollen hose, wiring arcing or resting on a hot surface, a loose driven accessory or a broken mount.
Isolate the vehicle according to company procedure and report the location, severity and conditions under which the defect appeared. For related systems, review ProntoCDL’s fuel and exhaust inspection guide, steering and suspension guide and air-brake component guide.
A 10-minute closed-yard practice drill
- Secure the truck and state the no-start condition aloud.
- Perform one wide scan and one ground scan before naming a component.
- Follow the same route: fluids, belts, hoses, wiring, accessories, fuel/exhaust, mounts.
- Give a three-part statement for each checkpoint: name, condition, purpose.
- Have the instructor identify one safe simulated defect, such as a disconnected training tag or pre-positioned stain card.
- Finish with a go/no-go decision and a specific defect report.
Do not loosen, damage or contaminate a working component to create a practice defect. Pair the drill with the Class A ELDT guide and reinforce inspection vocabulary in the free CDL practice center.
Practical takeaways
- Control the key, heat, stored pressure and hood before beginning.
- Make a full-compartment and ground scan before checking individual parts.
- Use eyes and a flashlight first; do not touch unknown fluid or a hot, pressurized hose.
- Inspect belts by condition and manufacturer specification, not a universal deflection claim.
- Follow hoses and wiring to their connections, supports and rub points.
- Keep clear of fans, belts and pulleys during every authorized running check.
- Describe evidence precisely and leave diagnosis and repair to qualified personnel.
- On a CDL test, connect each component’s name, condition and safety purpose.
CDL engine-compartment inspection FAQ
Is the engine compartment part of the CDL pre-trip test?
Yes. 49 CFR 383.113 specifically includes the engine compartment among the safety-related areas a CDL applicant must identify and explain how to inspect. The exact test procedure and scoring details come from the licensing State and the vehicle used for the test.
Should the engine be running during an engine-compartment inspection?
Most close visual checks are safest with the engine off, the parking brake applied and the key controlled. Some vehicle-specific or test procedures require an operational check. Follow the examiner, instructor, carrier and manufacturer procedure, and never reach near a belt, fan or other moving part while the engine is running.
Can I remove a coolant cap when the engine is hot?
No. A hot pressurized cooling system can release scalding coolant and steam. Check the reservoir by the approved visual method and allow the system to cool before any cap is opened under the vehicle manufacturer’s procedure.
How much belt deflection is acceptable on a commercial truck?
There is no single measurement that fits every belt drive. Automatic tensioners, belt span and manufacturer specifications differ. Inspect for cracks, fraying, glazing, contamination, missing ribs and obvious looseness, then use the vehicle or engine manufacturer’s specification for tension.
Does a small fluid leak mean the truck is safe to drive?
Size alone does not establish safety. A visible fuel leak is a periodic-inspection failure, and any active oil, coolant, steering-fluid or other leak can worsen or reach hot, electrical or braking components. Identify the location, avoid contact with unknown fluid and report the defect before moving.
What should I say about an engine component during the CDL test?
Use a three-part statement: name the component, describe the condition you are checking and explain the safety reason. For example: “The coolant reservoir is secure, the level is within the marked range, and I see no cracks or leaks so the engine can maintain proper operating temperature.”
Build one safe route under every hood.
Start wide, follow the systems, report the evidence and never trade inspection access for personal safety.
Start free CDL practice