
CDL Battery Box Inspection: Cables, Covers and Corrosion
A truck can have a strong charging system and still be unsafe if a battery shifts, a cable rubs through insulation or an enclosure traps leakage. A repeatable battery-box inspection catches those mechanical and electrical clues before vibration, heat or road spray makes them worse.
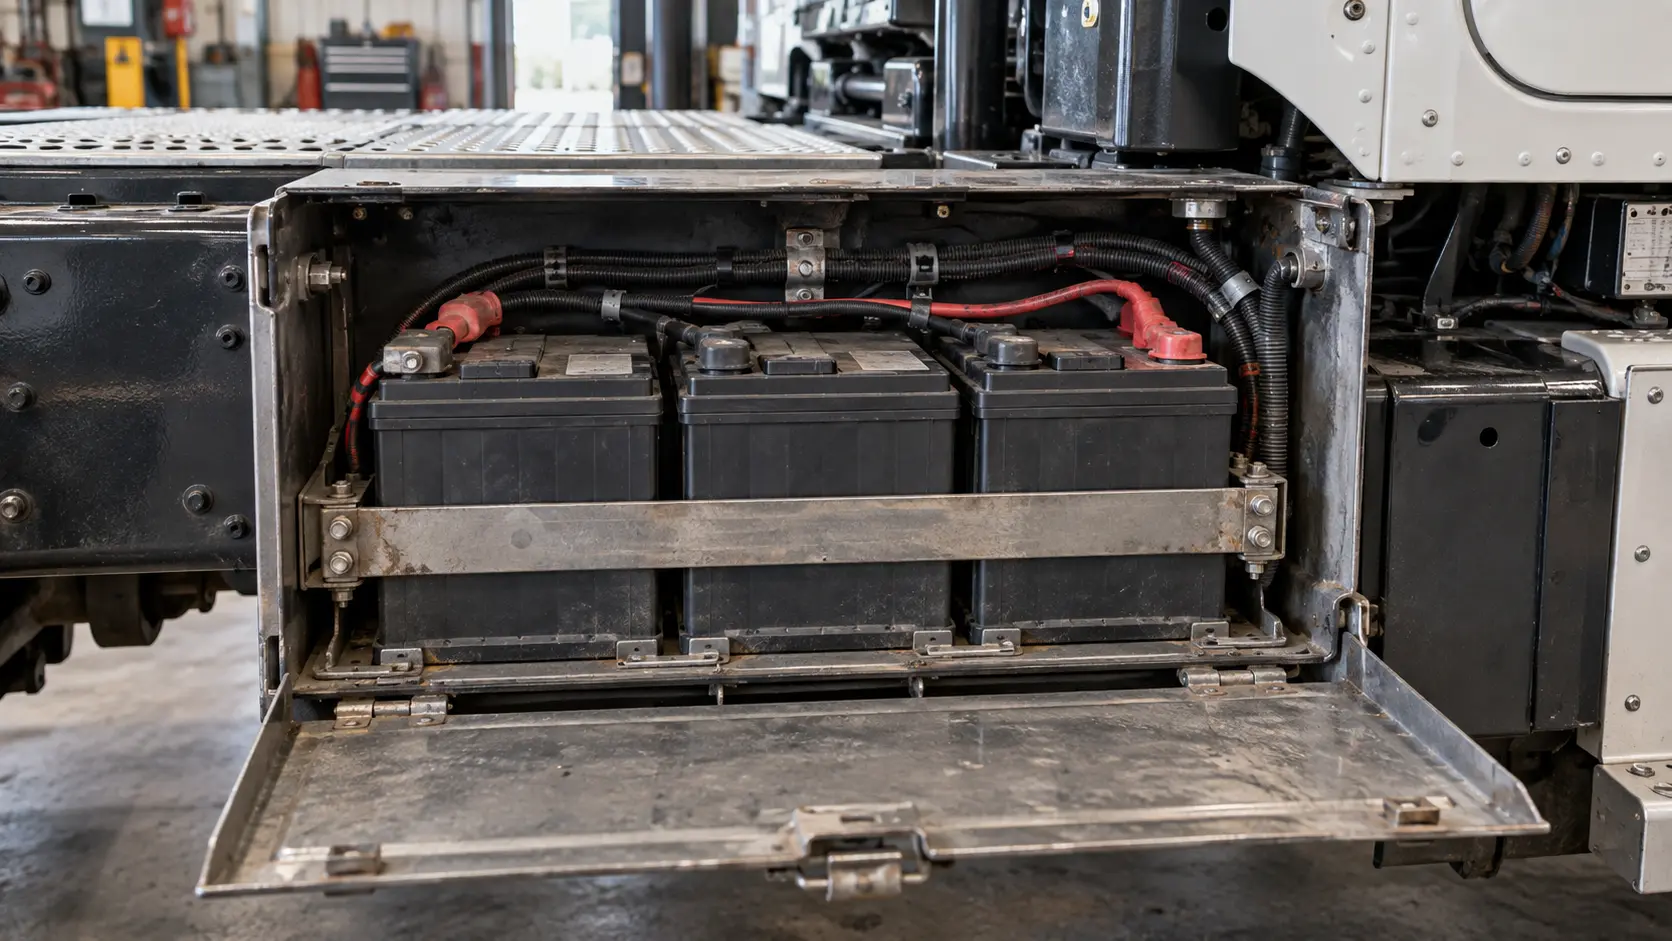
This guide separates a driver’s visual check from battery service. Drivers can verify that the enclosure, mounting and visible wiring appear secure and undamaged. Disconnecting cables, testing cells, neutralizing acid, load-testing batteries and repairing wiring belong to trained personnel using the vehicle manufacturer’s procedure.
49 CFR 393.30 sets specific battery-installation protections, while 49 CFR 393.28 addresses how vehicle wiring must be installed and maintained. Motor carriers must systematically inspect, repair and maintain safety-affecting parts under 49 CFR 396.3.
What the federal rules say
| Area | Federal baseline | Driver’s visible check |
|---|---|---|
| Cover or enclosure | A battery outside the engine compartment must be protected by a fixed vehicle part or a substantial removable cover that is securely latched or fastened. | Cover present, correctly seated, not badly bent, and able to stay closed. |
| Compartment surfaces | The battery compartment and adjacent metal that could corrode from leakage must have acid-resistant protection. | No severe flaking, holes, wet residue or corrosion that threatens the tray or support. |
| Ventilation and drainage | The compartment must have openings that provide ample ventilation and drainage. | Designed openings are present and not packed with debris, ice or spilled material. |
| Cable through metal | A starting-motor cable passing through a metal compartment must be protected by an acid- and waterproof insulating bushing. | Bushing or grommet present, seated and not cut through; cable insulation not rubbing the metal edge. |
| Wiring system | Electrical wiring must be installed and maintained to the incorporated federal standard. | Visible wiring supported, insulated and routed away from sharp edges, heat and moving parts. |
Make the area safe before opening it
Park on firm, level ground, apply the parking brakes, secure the transmission and control the ignition key. Turn off accessories and follow the carrier’s procedure before unlatching a battery box. Keep flames, smoking materials and sparks away; charging batteries can produce flammable gas.
Remove loose jewelry and do not lay tools, flashlights or metal objects across the battery tops. Wear the personal protective equipment required by the carrier. If the enclosure is hot, hissing, smoking, bulging or giving off a strong sulfur or burning odor, do not open or touch it. Keep people away and call maintenance or emergency services as the situation requires.
A repeatable battery-box inspection route
- Identify the box and its surroundings. Confirm that the enclosure is firmly attached and not exposed to a rubbing tire, exhaust heat, a damaged fuel component or a sharp moving part.
- Inspect the cover before opening. Check hinges, latch, fasteners and structure. The cover should be substantial, correctly aligned and capable of remaining secured over the batteries.
- Look at the tray and support. Check the bottom, brackets and adjacent metal for cracks, missing fasteners, severe corrosion, fresh movement marks or a sagging support.
- Verify battery restraint. Each battery should sit in the intended position, with the proper hold-down system present and secure. Look for shifted cases, polished rub marks or a loose retaining bar.
- Scan the cases. Look for cracks, bulging sides, distorted tops, wetness, damaged caps or evidence that a case has been rubbing the enclosure.
- Check visible terminals. Protective boots and covers should be present where designed. Report looseness, damaged connectors, heavy corrosion, dark heat marks or an exposed terminal that could contact the cover.
- Follow every visible cable. Look for cuts, worn insulation, crushed conduit, unsupported weight, overly tight bends and routing against sharp metal, heat or moving equipment.
- Inspect pass-through points. Confirm that cables passing through metal have intact bushings or grommets and are not rubbing the edge.
- Check vents and drains. Openings must not be intentionally sealed or blocked. Look for standing liquid, packed dirt or corrosion trails that show drainage is not working.
- Close and verify. Seat the cover fully, secure every latch and confirm that no cable is pinched. Never leave a battery box open for travel.
Read corrosion, leakage and heat clues correctly
Powdery white, blue or green material around terminals or seams is a corrosion clue, not something to wipe away casually. Wetness below a battery, softened paint, a corroded tray or a trail through the drain may indicate leakage. Report where the evidence starts and where it travels so maintenance can find the source.
Darkened insulation, melted loom, a deformed terminal boot or a sharply different cable color can indicate excess resistance or a short. Heat damage requires more than cleaning and tightening: the cable, connection, charging system and nearby components need a qualified evaluation.
Separate an electrical symptom from a diagnosis
Slow cranking, repeated clicking, dim lamps, an intermittent dashboard reset or a charging warning may involve a battery, cable, alternator, starter, ground path or another circuit. Record when the symptom appeared and what other systems changed. Do not assume that replacing or jump-starting the battery solves the cause.
A driver should not bypass a master disconnect, install an improvised jumper, bridge terminals or keep cycling the starter. Follow the carrier’s no-start and jump-start procedures, including equipment-specific voltage and connection points. The visual battery-box inspection provides evidence; qualified testing confirms the diagnosis.
What to say during a CDL inspection
State-test wording varies, and some vehicles place batteries under the hood or behind a locked service panel. On an accessible battery box, a clear explanation could be:
“The battery box is securely mounted. Its substantial cover, hinges and latch are in place. The batteries are restrained; the cases, terminals and visible cables show no cracks, leakage, heavy corrosion, loose connections, exposed conductors or heat damage. Cables are protected where they pass through metal, and ventilation and drainage openings are clear.”
Point to the actual components and follow the examiner’s directions. Never open a panel the test vehicle or testing authority does not permit you to access.
Stop and report these findings
- A battery that is loose, shifted, cracked, bulging, leaking, hissing or unusually hot.
- A missing or unsecured cover, broken latch, failed tray, loose mounting bracket or severe structural corrosion.
- A bare conductor, melted insulation, active arcing, smoke or a burning odor.
- A starting cable rubbing a metal pass-through or a missing, displaced or cut-through insulating bushing.
- A terminal or unprotected cable positioned where the cover or another metal part could create a short.
- Blocked ventilation or drainage, standing liquid, or leakage reaching nearby metal or equipment.
Identify the vehicle, box location and exact evidence. The ProntoCDL post-trip and DVIR guide shows how a precise defect description helps maintenance act.
Common battery-inspection mistakes
- Looking only for corrosion. A clean battery can still be loose, poorly covered or connected by a chafed cable.
- Tugging energized cables. Visual looseness or movement marks are reasons to report the condition, not to pull on the connection.
- Using the cover as a step. The enclosure is not a standing platform, and the added load can damage the lid, latch or cables below it.
- Blocking a drain to keep the box dry. Drainage and ventilation are deliberate safety features; correct the source of water or debris instead.
- Cleaning away evidence before reporting it. Corrosion or wetness may show maintenance where a leak or high-resistance connection began.
- Assuming a successful start proves safety. A truck may crank normally while a battery, tray, cover or cable remains unsafe.
Connect the battery box to the rest of the truck
Continue the electrical route with the engine-compartment inspection for alternator mounting, belts, wiring and leaks. Verify every required lamp with the truck-lighting guide, review heat and smoke decisions in the vehicle-fire response guide, and use the emergency-equipment checklist before departure.
Practical takeaways
- Secure the vehicle, control ignition sources and inspect without placing metal across terminals.
- Check the enclosure, support, restraint, cases, terminals, cables, bushings, vents and drains in one fixed order.
- Treat corrosion, wetness, rub marks and heat discoloration as evidence that deserves an exact report.
- Do not confuse a visual driver inspection with electrical testing or battery service.
- Never travel with an open or unsecured battery-box cover.
- Stop for looseness, leakage, bare wiring, arcing, smoke, strong heat or a burning odor.
CDL battery box inspection FAQ
Does federal law require a cover over a truck battery?
Yes, unless the battery is in the engine compartment. Under 49 CFR 393.30, every other storage battery must be covered by a fixed part of the vehicle or by a substantial removable cover or enclosure that is securely latched or fastened.
What should a CDL driver inspect in a battery box?
From a safe position, check the cover and latch, tray, hold-downs, cases, terminals, cable routing, protective boots, pass-through protection, ventilation and drainage. Look for looseness, chafing, heat damage, corrosion, leakage or contact between an unprotected conductor and metal.
Is white or green buildup on a battery terminal acceptable?
Powdery white, blue or green buildup is evidence of corrosion and should be reported. Do not brush or blow it away during a routine driver inspection because residue may be irritating or corrosive and disturbing it can hide the source.
Can a driver tighten a loose battery cable during a pre-trip?
Only if the carrier authorizes the task and the driver has the correct training, personal protective equipment and vehicle procedure. A routine inspection should identify and report looseness; using a metal tool around an energized battery can create a short circuit, arc or injury.
What is a battery-cable pass-through bushing?
It is insulating protection where a cable passes through a metal wall or compartment. Section 393.30 specifically requires an acid- and waterproof insulating bushing where the starting-motor cable passes through a metal compartment, helping prevent the cable from grounding against the edge.
Should a truck move with a damaged battery box?
Do not move the vehicle when a battery is loose, a cable is bare or arcing, a case is cracked or leaking, the cover cannot be secured, or there is smoke, strong heat or a burning odor. Isolate the area and obtain a qualified maintenance decision under carrier procedures.
Inspect the electrical source before it becomes a roadside problem.
Follow the same cover-to-cable route at every battery box and report the evidence precisely.
Start free CDL practice