
CDL Trailer Landing Gear Inspection: Crank, Braces & Feet
Trailer landing gear supports thousands of pounds when a semitrailer is uncoupled, then must retract completely and stay clear while the combination moves. A strong inspection follows the load path from the trailer frame through the mounts, braces, gearbox, legs and feet—then finishes with operation, crank storage and turning clearance.
The federal Class A ELDT curriculum requires instruction and demonstrated proficiency in inspecting, coupling and uncoupling combination vehicles. Federal maintenance rules also require safety-affecting parts to remain in safe operating condition, and 49 CFR 396.13 requires the driver to be satisfied the vehicle is safe before driving. This guide turns those duties into a practical landing-gear routine. Pair it with the fifth-wheel coupling guide, frame and crossmember guide and post-trip and DVIR guide.
Know what carries the trailer
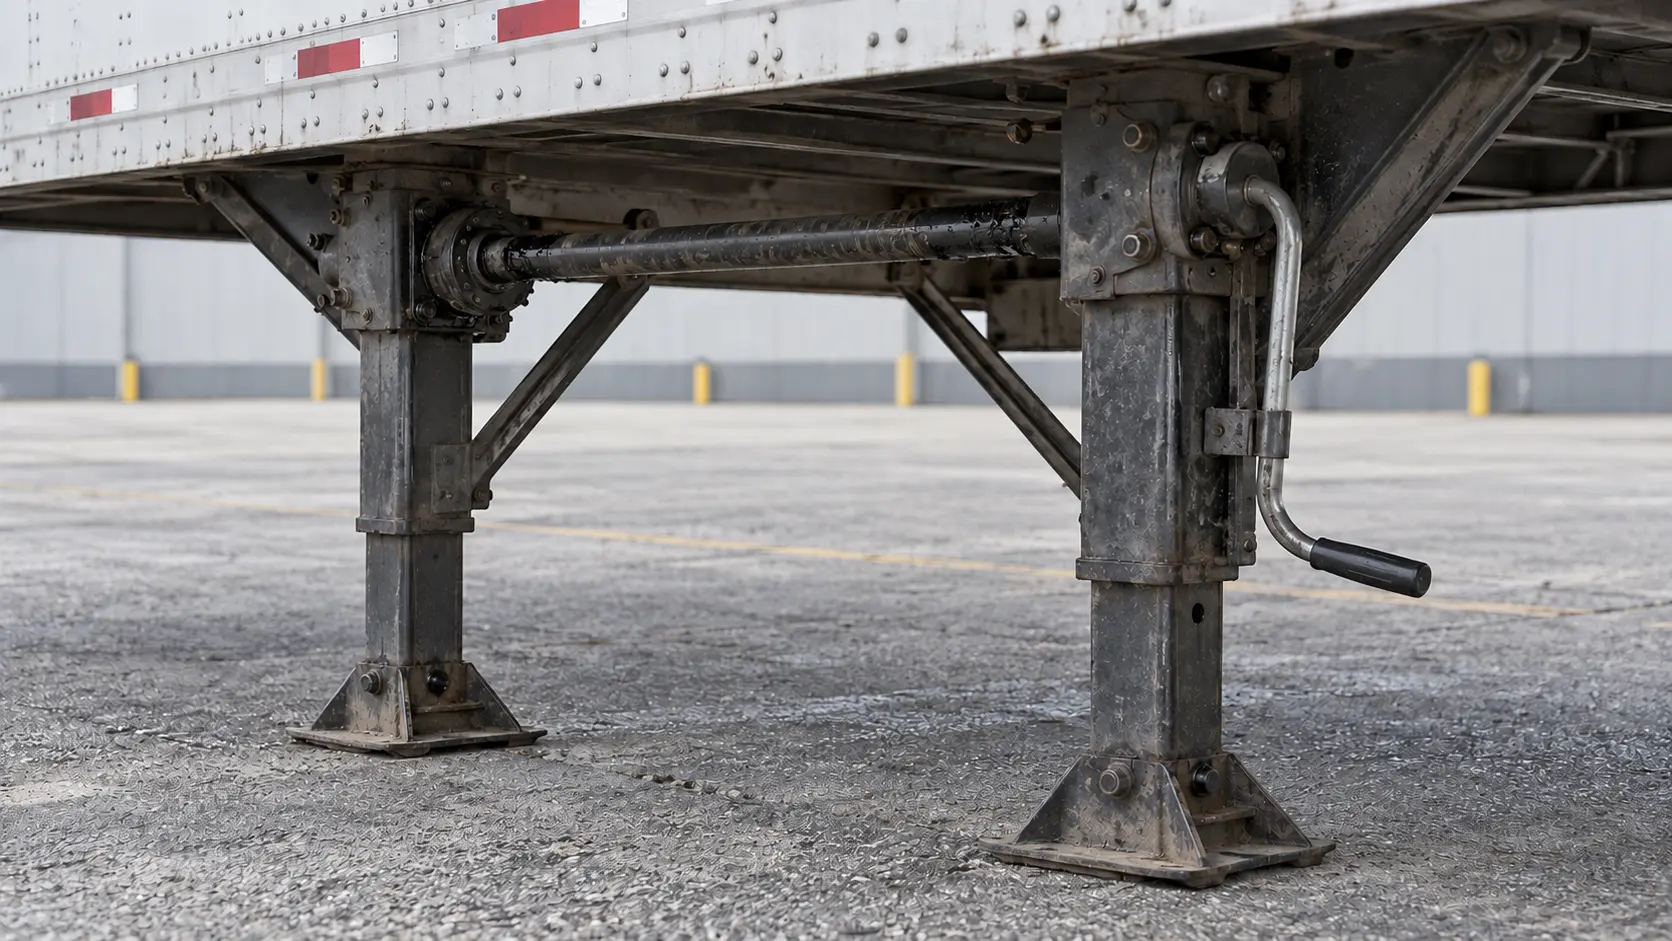
Most dry vans and refrigerated semitrailers use two telescoping support legs joined by a cross-shaft. Turning the crank drives a gearbox on one leg; the cross-shaft transfers motion so the second leg travels with it. Braces resist fore-and-aft and side loads. Feet, often called sand shoes, spread the load on the parking surface. Mounting plates, bolts and welds transfer the load into the trailer structure.
That load path explains why checking only the crank is not enough. A gearbox may turn while a brace is cracked, a mounting hole is elongated or one foot is sinking. Conversely, a leg can look straight while damaged internal gearing causes uneven travel or sudden crank movement. Inspect structure first, then operate the mechanism only when the trailer and tractor are secured for the task.
A repeatable landing-gear walkaround
- Secure the combination and choose your position. Park on firm, level ground, set the parking brakes and follow the carrier’s wheel-chock procedure. Stay out of pinch zones and from beneath an unsupported trailer.
- Look at the pair from a distance. Both legs should appear straight, parallel and at matching height. Compare the feet and lower tubes for leaning, twist or uneven contact.
- Trace each mounting point. Check plates, bolts, nuts, welds and the nearby trailer structure. Look for missing hardware, cracks, torn metal, polished movement marks, shifted washers and elongated holes.
- Follow every brace. Braces should be present, securely attached and free of bends, buckles and cracked ends. A straight leg is not fully supported when a brace or gusset has separated.
- Inspect the telescoping legs. Look for bent tubes, severe dents, perforating corrosion, damaged adjustment holes, debris and fresh scrape patterns that suggest binding.
- Check the feet and surface. Sand shoes should be attached, reasonably flat and supported across their area. Watch for broken pivots, folded edges, soft shoulders, drains, voids, ice or pavement that is already crushing.
- Inspect the drive system. Check the gearbox housing, cross-shaft, couplings and retaining hardware. A missing pin, displaced shaft or split housing can stop one leg from following the other.
- Finish at the crank. The handle, grip and hinge should be complete. Confirm the handle fits its storage bracket and cannot swing into traffic, tires, hoses or another component.
What the operating check can reveal
| Observation | Possible concern | Safe driver response |
|---|---|---|
| Both legs move smoothly and evenly | Normal operation, subject to the rest of the inspection | Continue while monitoring contact, clearance and crank control |
| One leg moves while the other lags | Cross-shaft, coupling, retaining pin or internal gear problem | Stop; keep the trailer supported and report the exact behavior |
| Grinding, popping or sudden binding | Damaged gears, bent tubes, contamination or load beyond normal operation | Do not force the crank or add leverage; report for maintenance |
| Crank kicks or spins unexpectedly | Stored load, worn mechanism or poor handle control | Release carefully, keep body clear and stop the operation |
| Foot sinks or tilts as load transfers | Weak or uneven supporting surface | Stop transferring weight and reposition under an approved plan |
| Powered unit leaks air or hydraulic fluid | Damaged line, fitting, cylinder or control | Secure the unit and report the leak; do not improvise a repair |
Use the designed crank grip and a stable stance. Keep your face, knees and torso outside the handle’s rotation path. Extra pipe, a pry bar or body weight can multiply force beyond the mechanism’s design and turn a minor bind into component failure or injury.
Raise the gear correctly after coupling
The current New York CDL combination-vehicle manual provides a useful sequence: after confirming the fifth-wheel connection and connecting the air and electrical lines, start lifting with low range when the gear is carrying weight. Once the legs are free of the trailer load, high range may be used if the equipment has it.
Raise the landing gear completely. Partly retracted gear can catch a railroad crossing, pavement crown, curb, ramp or yard obstruction. Then secure the crank handle in its bracket. A free-swinging handle can strike equipment, snag an object or rotate the mechanism.
With the trailer weight on the tractor, check space between the landing gear and the back of the tractor frame through the turning envelope. Also verify clearance between the tractor tires and the trailer nose. A successful tug test proves the kingpin connection; it does not prove that the landing gear will clear a sharp turn.
Lower the gear safely before uncoupling
First choose a parking surface that can support the trailer. Line the tractor and trailer up; pulling out at an angle can side-load and damage the legs. Secure the trailer according to the coupling procedure before transferring weight.
Lower both feet until they make firm, even contact. The CDL manual distinguishes empty and loaded trailers: for an empty trailer, firm contact is the stopping point; for a loaded trailer, after contact, use low range for additional turns to lift some trailer weight from the tractor. Do not lift the trailer clear of the fifth wheel. Keeping the tractor frame under the trailer during the first part of pullout provides a last opportunity to notice sinking or collapse before the tractor fully clears.
After partially pulling out, stop, secure the tractor and inspect the supports. Confirm the ground is holding and the landing gear remains undamaged before clearing the trailer. This pause matters on hot asphalt, gravel, soft shoulders and any surface with a hidden void.
Defects that deserve a stop-and-report decision
- a missing, loose or visibly shifted mounting fastener;
- a cracked weld, torn mounting plate or crack in the trailer structure;
- a bent, twisted or buckled leg, brace, foot or cross-shaft;
- one leg traveling differently from the other;
- a gearbox housing that is split, displaced or leaking;
- grinding, popping, severe binding or uncontrolled crank movement;
- a foot that cannot sit flat or a surface that will not support it;
- gear that will not retract completely or a crank that will not stay secured; or
- insufficient clearance to the tractor frame, tires or trailer nose.
49 CFR 396.3 requires systematic inspection, repair and maintenance of safety-affecting parts. A driver’s best contribution is a precise description: identify the side, part, position, movement and conditions. “Right leg stops while left leg continues after two crank turns” gives maintenance far more than “landing gear bad.”
CDL test language versus shop diagnosis
For a vehicle-inspection test, point to the landing gear and explain that it is fully raised for travel, not bent or damaged, has no missing parts, and the crank handle is present and secured. If it is power operated, add that there are no air or hydraulic leaks. During coupling, explain full retraction, crank storage and tractor-clearance checks. During uncoupling, explain firm ground support and the intermediate support check.
A driver is not expected to diagnose internal gear teeth or certify a structural repair. Do not conceal a problem by overcranking, striking the leg, bypassing a retaining pin or tying the handle up with an improvised restraint. Secure the equipment, document the condition and use the carrier’s maintenance process.
Practical takeaways
- Inspect the complete load path: trailer structure, mounts, braces, gearbox, shaft, legs and feet.
- Compare both legs for straightness, equal movement and even contact.
- Use low range while the gear carries weight; use high range only after the load is removed and when the equipment provides it.
- Raise the gear completely for travel and secure the crank in its holder.
- Check landing-gear clearance from the tractor frame and tire-to-trailer clearance after coupling.
- Choose firm support before uncoupling and pause with the tractor partly beneath the trailer to verify the legs are holding.
- Never force a bind with extra leverage or place yourself beneath unsupported equipment.
CDL trailer landing gear FAQ
What should a CDL driver inspect on trailer landing gear?
Check both legs, telescoping sections, gearbox, cross-shaft, braces, mounting plates, bolts or welds, feet or sand shoes, and the crank and its storage bracket. Look for missing parts, bending, cracks, loose attachment, heavy corrosion, leaks on powered units and signs that the two legs are not moving together.
Should landing gear be fully raised before driving?
Yes. The current New York CDL combination-vehicle manual says to raise it all the way, secure the crank and verify tractor-frame and tire clearance. Partly raised gear can strike tracks, pavement, curbs or other objects.
When should low and high landing-gear ranges be used?
On two-speed gear, use low range while the gear is carrying trailer weight. After the legs are free of the load, high range can speed retraction. Follow the equipment instructions because shift direction and engagement can vary by model.
How far should landing gear be lowered when uncoupling?
Lower it until both feet make firm, even contact with a surface that can support the trailer. For a loaded trailer, the CDL manual calls for additional turns in low gear after contact to lift some weight from the tractor, without raising the trailer off the fifth wheel.
Can a driver crawl under the trailer to inspect landing gear?
A routine walkaround should be performed from outside the trailer footprint with the combination secured. Use a light and change viewing angles. Do not place any part of your body beneath an unsupported trailer or between equipment that could move.
Is a stiff crank automatically a failed landing-gear assembly?
Not automatically, but sudden resistance, grinding, uneven leg travel or a crank that kicks back is a stop-and-report clue. Do not add extensions, jump on the handle or force the mechanism; those actions can injure the driver or damage gears and shafts.
Practice the full support-system check.
Trace the mounting structure to both feet, operate only under controlled conditions and finish with full retraction, crank storage and clearance.
Start free CDL practice