
CDL Wheel and Rim Inspection Guide: Lugs, Cracks and Hub Leaks
Wheel-end problems often announce themselves before a failure: a thin rust trail, fresh lubricant, a polished ring around a fastener, a distorted bolt hole or a valve stem rubbing the rim. A disciplined pre-trip turns those small clues into an early repair instead of a roadside emergency.
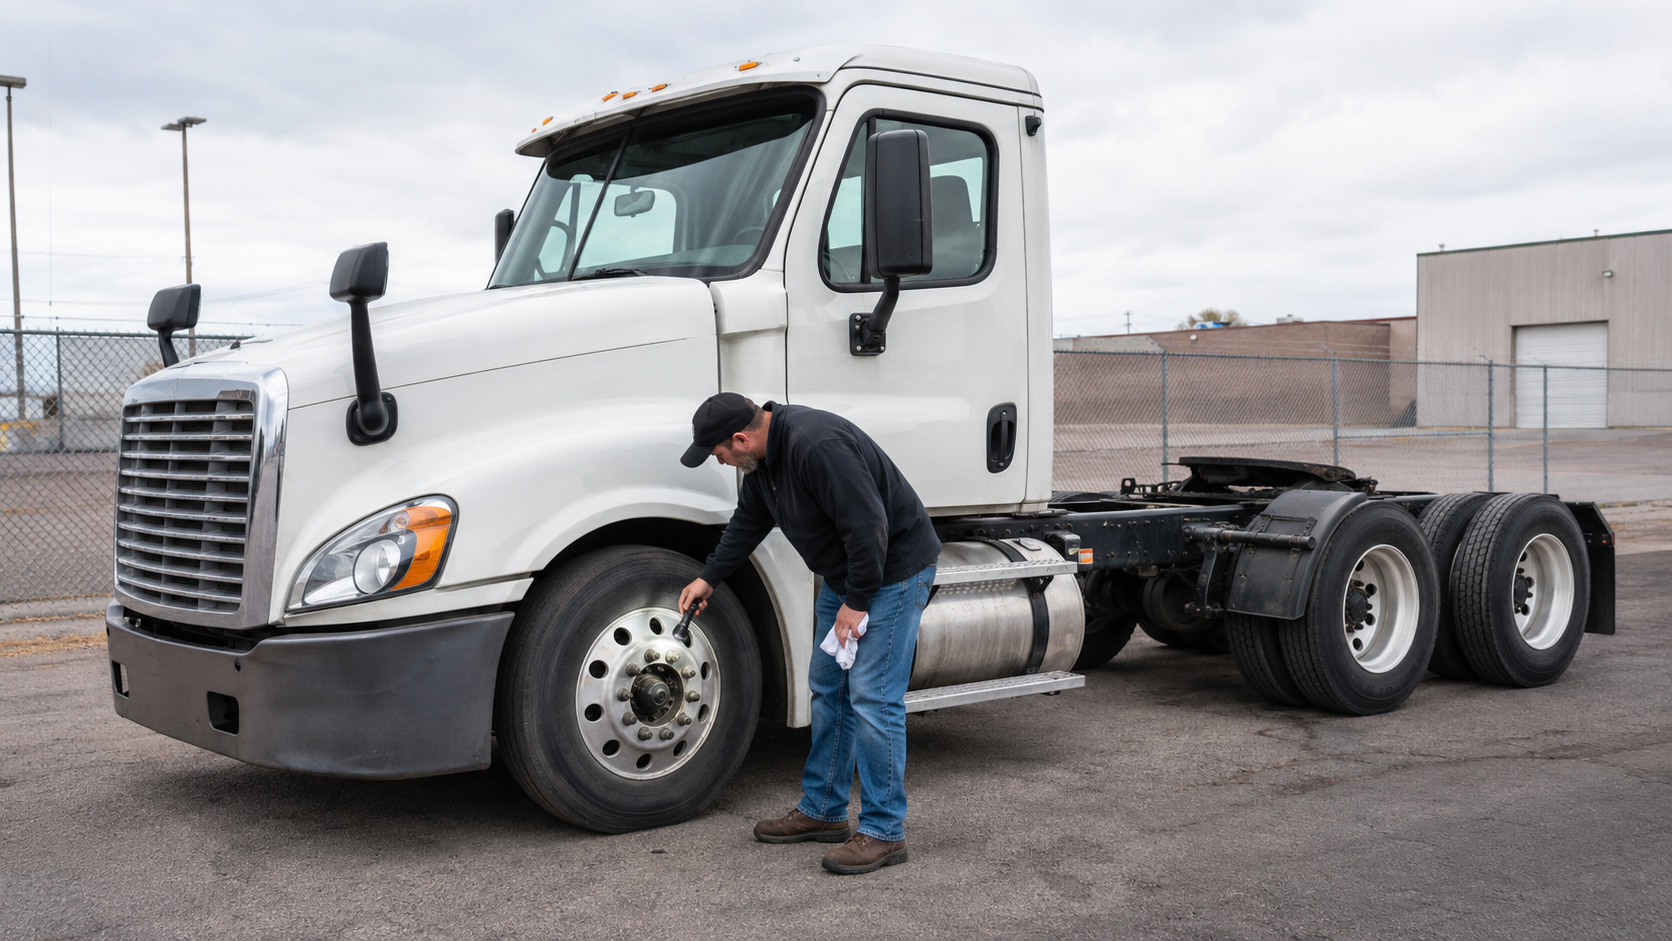
Current federal rules are direct. 49 CFR 392.7 says a commercial motor vehicle must not be driven until the driver is satisfied that its wheels and rims are in good working order. 49 CFR 393.205 says wheels and rims must not be cracked or broken, stud or bolt holes must not be elongated, and wheel nuts or bolts must not be missing or loose. FMCSA’s Motor Carrier Safety Planner summarizes the same requirements.
Separate the wheel check from the tire check
The tire and wheel work together, but they are not the same component. Tire inspection focuses on tread, inflation, cuts, bulges and exposed structural material. Wheel inspection focuses on the rim or disc, bolt holes, studs, nuts, hub area, valve access and the relationship between paired wheels.
Keeping the two checks separate prevents a common mistake: looking carefully at the rubber while scanning past the metal and fasteners that hold the assembly to the vehicle. Use the ProntoCDL tire inspection guide for the tire portion, then use the sequence below for the wheel end.
Use one repeatable inspection order
Start at the driver-side steer wheel and continue around the vehicle in the same direction every time. At each position, move from the outside toward the center:
- Rim or wheel disc: cracks, breaks, bends, missing pieces and improper repairs.
- Stud and bolt holes: round shape, no elongation and no polished movement marks.
- Nuts, bolts and studs: all present, seated and free of visible looseness or damage.
- Hub and seal area: correct lubricant level where visible, no fresh leak and no heat warning signs.
- Valve stem: secure, accessible, capped and not rubbing another component.
- Dual-wheel area: both wheels visible as far as practical, safe spacing and no trapped debris.
Use a flashlight even in daylight. Cracks often begin near bolt holes, hand holes, weld areas or changes in shape where shadows can hide them.
1. Inspect the rim or wheel disc for cracks and damage
Clean enough dirt from the surface to see the metal. Trace the wheel around the bead-seat area, hand holes, bolt circle and visible attachment points. Look for a hairline crack, missing section, deformation, heavy impact mark or surface that no longer runs true.
Light surface rust and a structural crack are not the same thing. A crack usually has a defined line and may collect dark dirt or fresh rust. If the condition is uncertain, do not dismiss it. Mark the location and have qualified maintenance inspect it before the vehicle moves.
2. Check every stud and bolt hole
The holes should remain round and should fit the fasteners correctly. An elongated or out-of-round hole can show that the wheel moved against the studs. Look for an oval shape, bright polished metal, chipping paint, wallowed material or a washer that no longer sits evenly.
Do not judge only from across the yard. Change your viewing angle and compare questionable holes with the others on the same wheel. Movement at one fastener often leaves a different wear pattern than ordinary road dirt.
3. Account for every lug nut, bolt and stud
Count the fasteners and inspect each one. None may be missing or loose. Look for a nut sitting farther out than its neighbors, a cracked nut, damaged threads, a broken stud, a missing washer where the design uses one or a fastener that appears crooked.
Useful warning clues include:
- Rust streaks radiating outward from a nut or bolt
- Fresh shiny metal around the fastener or hole
- Paint or inspection marks that no longer align
- Metal dust, chips or fretting residue near the joint
- A washer that turns, shifts or does not sit flat
These clues call for a closer inspection; they do not give a driver permission to guess at torque. Wheel-fastener service requires the correct procedure, tools, sequence and specification.
4. Inspect the hub, axle seal and lubricant level
On a steer hub with a sight window, check the lubricant level against the hub manufacturer’s marks and procedure. The window should not be broken, clouded beyond inspection or leaking. On other wheel ends, inspect the visible hub and axle-seal areas for fresh oil or grease.
Dry road film is different from active wetness. A fresh leak may form a wet path across the hub or wheel, collect dust into a heavy paste or sling outward in a circular pattern. Lubricant reaching the brake area is especially serious because it may reduce braking performance.
Also watch for heat clues: discolored metal, melted hubcap material, a burned smell or smoke. Do not touch a suspected overheated wheel end with a bare hand. Secure the vehicle and request qualified inspection.
5. Check the valve stem and inflation access
The valve stem belongs to the tire system, but its position at the wheel makes it part of a complete wheel-end scan. It should be secure, capped, undamaged and accessible for pressure checks. Look for a bent stem, damaged threads, missing cap, cracked extension or a stem rubbing the rim, hub or adjacent dual.
Do not pull, bend or force a valve extension merely to reach it. If access is poor, report the condition so it can be corrected without damaging the valve.
6. Give dual wheels a two-angle inspection
Inspect the outer wheel, then use a light to view the inner wheel through the hand holes and from behind when safely accessible. Check that both wheels are seated normally and that nothing is trapped between the dual tires. A rock, metal object or packed debris can damage sidewalls and hide other problems.
Look for evidence that the dual tires touch each other or another component. Confirm that valve stems and extensions are protected and reachable. Never crawl beneath an unsupported vehicle or place yourself in a pinch point to improve the view.
7. Inspect after a wheel change or recent service
A recently installed wheel deserves deliberate attention. Review the maintenance paperwork and follow the carrier or manufacturer’s required post-service inspection and retorque procedure. During the walkaround, look for fresh movement marks, missing hardware, a displaced valve extension or lubricant leakage.
A driver should not invent a torque value or tightening schedule. Wheel systems vary, and correct service depends on the wheel, fastener and manufacturer instructions.
Know when the vehicle should not move
Do not dispatch a commercial motor vehicle when you find a cracked or broken wheel or rim, an elongated stud or bolt hole, or a missing or loose wheel nut or bolt. Those conditions directly conflict with 49 CFR 393.205.
Other warning conditions—such as a fresh hub leak, oil in the brake area, a broken stud, severe deformation, overheating evidence or uncertainty about a structural line—also require the vehicle to be secured and evaluated under the carrier’s maintenance procedure. A driver’s role is to recognize, locate and report the condition accurately, not to make a roadside engineering judgment.
Use precise defect language
A report such as “wheel bad” slows the repair. Identify the unit, axle, side, inner or outer position and visible condition. Examples:
- “Tractor steer axle, passenger side: fresh hub oil across the lower half of the rim.”
- “Tractor forward drive axle, driver side outer: one missing lug nut at approximately the two-o’clock position.”
- “Trailer rear axle, passenger side inner: suspected crack extending from a hand hole; vehicle held for inspection.”
Do not move a vehicle just to make the clock-face position easier to describe. A photo taken under carrier policy can help maintenance, but it never replaces securing an unsafe vehicle.
A short memory routine: Metal, Holes, Hardware, Hub
- Metal: rim or disc is not cracked, broken, bent or improperly repaired.
- Holes: stud and bolt holes are round and show no movement.
- Hardware: every nut, bolt, stud and required washer is present and seated.
- Hub: lubricant, seal, temperature clues and valve access appear normal.
Repeat those four words at every wheel position. Consistency matters more than speed.
Practical takeaways
- Federal rules prohibit cracked or broken wheels and rims.
- Stud and bolt holes must not be elongated or out of round.
- Wheel nuts and bolts must not be missing or loose.
- Rust trails, polished metal and shifted paint marks are warning clues that require a closer look.
- Fresh hub lubricant, oil near brakes or heat evidence calls for immediate reporting.
- Inspect inner dual wheels with a light and from more than one safe angle.
- Describe defects by unit, axle, side and exact wheel position.
- Never guess at wheel-fastener torque or perform repairs without authorization, training and the correct procedure.
Continue the walkaround with the commercial tire inspection guide, review component vocabulary in the ProntoCDL CDL glossary, study complete systems in the CDL study guides, and reinforce your inspection sequence in the ProntoCDL practice center.
Frequently asked questions
Can a commercial truck operate with one missing lug nut?
Federal rule 49 CFR 393.205 says wheel nuts and bolts must not be missing or loose. A driver who finds a missing, loose or ineffective wheel fastener should not dispatch the vehicle and should report the exact wheel position for qualified repair.
What do rust trails around lug nuts mean?
Rust trails can be evidence of movement or moisture around a fastener. They are a warning clue, not a stand-alone diagnosis. Check for missing, loose or damaged fasteners and elongated holes, then follow the carrier’s defect-reporting and maintenance procedure.
Is a hub oil leak the same as a tire problem?
No. A hub or axle-seal leak is a wheel-end condition, although leaked lubricant can spread onto the wheel, tire or brake components. Report fresh wetness, a low hub level, oil on the brake area or signs of overheating before operation.
Can a CDL driver tighten a loose lug nut during a pre-trip?
Only if the driver is authorized, trained and equipped to follow the carrier and manufacturer procedure. Correct wheel-fastener torque and tightening sequence matter. The safer general response is to stop, identify the position and have qualified maintenance evaluate it.
How should I describe a wheel defect?
Name the vehicle unit, axle, side and wheel position, then describe the visible condition. For example: “tractor, steer axle, driver side—one missing lug nut and rust movement marks at the adjacent hole.” Precise location prevents delay and wrong-wheel repairs.